Print in Microsoft Edge
Microsoft Edge offers a seamless browsing experience and comes equipped with a variety of tools and features. One such essential feature is the ability to print web pages directly from the browser. In this article, we will explore the various aspects of printing in Microsoft Edge.
To address printing issues in Microsoft Edge, refer to Troubleshoot printing issues in Microsoft Edge.
Access the Print functionality
Printing in Microsoft Edge is a straightforward process and can be done in multiple ways.
- Using Keyboard shortcut: Press Ctrl + P on Windows or Command + P on Mac to open the print dialog.
- Menu option: Click on the three horizontal dots in the top-right corner of the browser to open the menu. Select Print from the dropdown menu.
- Right-Click Menu: Right-click anywhere on the webpage and select Print from the context menu.
Customize your printout using the dialog options
Once you've accessed the print dialog, you'll be presented with a range of options to customize your print job.
Choose the printer you want to use: Choose the printer you want to use. If you have multiple printers installed, select the one that suits your needs.
Choose the orientation of the printout: Adjust the Layout settings based on your preference such as Portrait or Landscape orientation.
Choose the number of copies you wish to print: Navigate to Copies and provide the number of copies you wish to print.
Choose the color of your printout: Navigate to Color and select the dropdown as Color or Black and White as per your need.
Choose the paper size: Under More settings, choose the Paper size based on your need:
- Letter - 8.5 x 11 inches
- Tabloid -11 x 17 inches
- Legal - 8.5 x 14 inches
- Executive - 7.25 x 10.5 inches
- A3 - 11.69 x 16.54 inches
- A4 - 8.3 x 11.7 inches
- B4 (JIS) - 9.8 x 13.9 inches
- B5 (JIS) - 6.9 x 9.8 inches
- Envelope #10 - 4.125 x 9.5 inches
- Envelope Monarch - 3.875 x 7.5 inches
Choose number of pages to print per sheet: Printing multiple pages on a single sheet of paper is a useful technique to save paper, reduce printing costs, and create compact versions of your documents. The number of pages that can be printed on a single sheet depends on the capabilities of your printer and the printing options you choose (Example: 1, 2, 4, 6, 9 or 16 pages per sheet). Under More settings, choose Pages per sheet as per your need.
Choose the quality of the print: DPI (dots per inch) is a measure of printing resolution. Under More settings, navigate to Quality and choose the quality based on your need:
- 600 DPI: This is a standard resolution for many printing purposes. It provides good quality for most text documents and images. It's commonly used for everyday printing tasks.
- 1200 DPI: This is a higher resolution and generally produces sharper and more detailed prints. It is often used for tasks where high-quality output is crucial, such as professional graphics, detailed images, or photographs.
Additionally, the type of printer and the quality of paper used can also impact the final print quality. It's a good idea to consider the capabilities of your printer and the intended purpose of the printed material when choosing a DPI setting.
Choose the pages you want to print
Specify which pages to print. You can choose to print all pages, a range of pages, or even select specific pages. Select an appropriate option under Pages:
- All: This will print all pages.
- Odd pages only: This will print only odd numbered pages such as 1, 3, 5 and so on.
- Even pages only: This will print only even numbered pages such as 2, 4, 6 and so on.
- Custom: You'll see a checkbox where you can enter the range of pages such as 1-5, or even select specific pages separated by comma such as 3, 6, 8 and so on.
Customize the margins as per your need
Under More settings, scroll down to Margins and select an option under it as per your need.
- Default: This option will leave 1-inch margins on all sides.
- None: This option eliminates margins on all sides.
- Minimum: Many printers have a minimum margin requirement of around 0.25 inches (6.35 mm) on all sides. However, this can vary, and some printers may allow for smaller margins.
- Custom: If you choose custom, you have to manually enter the Top, Bottom, Left and Right margins. You can review how those margins look using the Preview button before sending it to the printer.
Resize the document to match paper size for printing
Scale to print is a feature that allows you to adjust the size of a document to fit the size of the paper being printed. Choose an option as per your need:
- Fit to printable area: This option will automatically adjust the size of the content to fit within the printable area of the paper.
- Actual size: This option prints the document in its original size without any scaling.
- Custom: Choosing a value allows you to manually specify the scaling factor for printing. For example, if you set the scaling to 50%, the document will be printed at half its original size. If you set it to 200%, the document will be printed at double its original size. This option provides flexibility for resizing the document according to your preferences.
Caution: It's recommended to preview the printout or use test prints to ensure that the scaled output meets your expectations before printing a large batch.
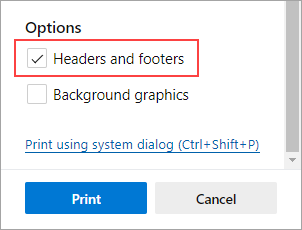
Add the date to the page header and page number to the footer
To print the current date in the header or the page number in the footer, do the following:
- Open the website or PDF document you want to print.
- At the top of the page, select Settings and more >Print , or press Ctrl+P on Windows devices or Command+P on macOS devices.
Tip: You can also right-click any empty space on the page and select Print in the context menu.
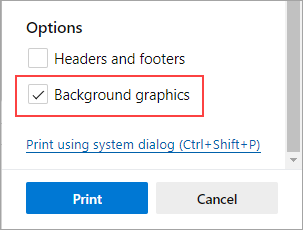
Remove or include the webpage background when printing
You can include background graphics when you print a web page.
- Open the website or web app document you want to print.
- At the top of the page, select Settings and more >Print , or press Ctrl+P on Windows devices or Command+P on macOS devices.
Tip: You can also right-click any empty space on the page and select Print in the context menu.
Tip: If the print preview or output looks different from the web page you're printing, you should include the background graphics.
Print clutter free
A clutter-free print option removes surrounding material, such as ads and site navigation, from a printed web page. We're working to release a clutter-free printing option that will be available directly through the print dialog. In the meantime, you can use Immersive Reader as a workaround for clutter-free printing. Note that Immersive Reader may not be available for all websites.
- Open the website you want to print.
- In the address bar, select the Immersive Reader icon , or press F9 (on Windows devices) to enter Immersive Reader.
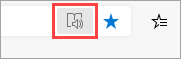 Select Immersive Reader" />
Tip: You can also right-click on any empty space on the page and select Print in the context menu.
Print a part of webpage
To print only a part of a website, do the following:
- Click and drag over a section of text or images to select the part of the website you want to print.
- Right-click the selected text and then select Print in the context menu.
- Choose the print options you want, and then select Print.
Print a web page using the system print dialog
- In Microsoft Edge, open the website or web app document you want to print.
- At the top of the page, select Settings and more >Print , or press Ctrl+P in Windows or Command+P in macOS.
- Select Print using system dialog.
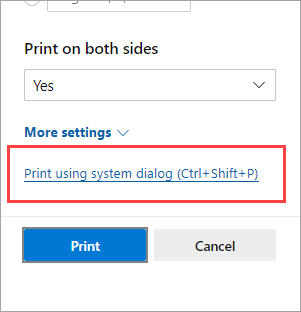
Tip: To open the system Print dialog directly, press Ctrl+Shift+P on Windows devices, or Option+Command+P on macOS devices.
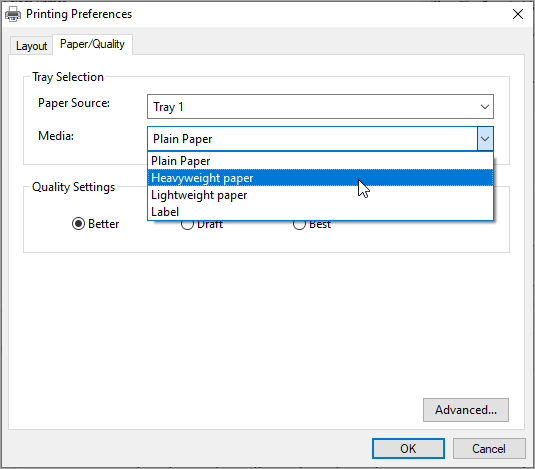
Access print options available in legacy Microsoft Edge
To access the print options that were available in the legacy Microsoft Edge Print dialog box, such as paper source, media, and print quality, do the following:
- Open the system Print dialog box, as described in the section above.
- In the Select Printer list, select your printer.
- Select Preferences.
- In the Layout and Paper/Quality tabs, choose the options you want. Note that the options available depend on the printer you've selected.
Want to provide feedback?
If you have other issues printing from Microsoft Edge, you can provide direct feedback to us by selecting Send feedback in the top corner of the browser.
When you report an issue, please include the following details:
- A description of the error
- The website or document you were trying to print
- The steps you took before the issue occurred
- The printer you're using
With more information, we can resolve your issues more quickly.
